
Speeding Up My Shell (Oh My Zsh)
My shell startup has felt laggy for a while, but never quite slow enough that I felt compelled to track down the cause. Until today. Today I finally put in work, managing to shave nearly a second off its load time through a few adjustments to my setup with Oh My ZSH.
tldr; Virtual environment managers (nvm, rbenv, jenv, etc) are the most common culprits for a slow loading terminal, and there are a few approaches to speeding them up.
Terminal configuration/optimization is a rabbit hole leading to infinite other rabbit holes. Some of the dotfile setups that I came across are truly impressive.[1] But I don't have the time right now to craft a setup like that; I'll take the easy wins, without getting bogged down by micro-optimizations.
Initial Setup
I'm on a Mac, using iTerm2 with Oh My Zsh, which seems to be a fairly common setup. Over the course of years and software projects, I've hooked a handful of tools into my shell's startup/config, including:
I've also installed a number of plugins for zsh; when I started investigating what was slowing down my shell, my plugin list was: git, zsh-autosuggestions, npm, docker, docker-compose, doctl, and terraform.
So, at the start of this, my shell load time was: 1.35 seconds. First, let's take a look at how I found that out.
How To Test Your Shell Load Time
If you want to improve your shell's load time, you need to be able to measure it. For that, I found a handy script that times the startup of an interactive shell:
for i in $(seq 1 10); do /usr/bin/time $SHELL -i -c exit; doneIn my case, the $SHELL being referenced is /bin/zsh, and we're looping over the startup ten times to account for variability.[2] After reading a few more blog posts I learned that, for ease of calling, we can add this as a function to our ~/.zshrc
timezsh() {
  shell=${1-$SHELL}
  for i in $(seq 1 10); do /usr/bin/time $shell -i -c exit; done
}
With that, we can just call timezsh whenever we want to measure the shell's load time. And my initial results were:
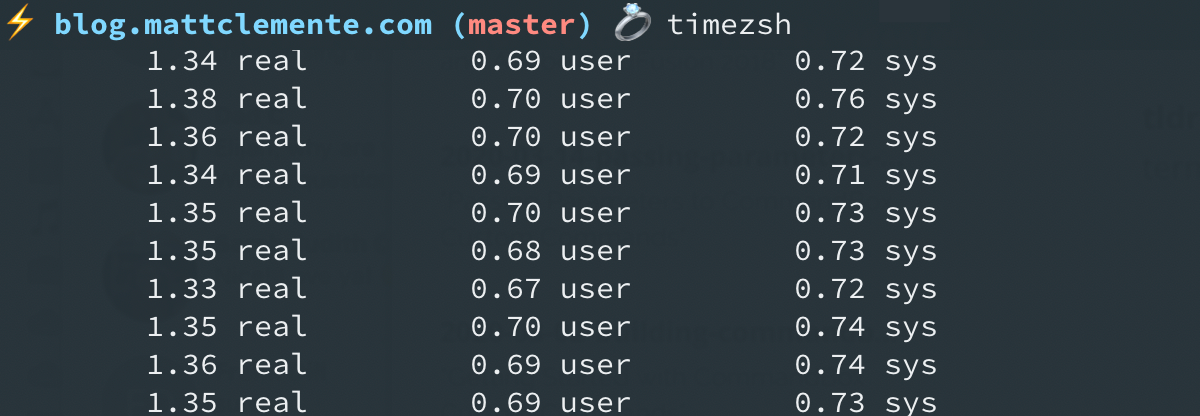
Not good, which meant there was a lot of room for improvement.
Measuring Plugin Load Time
I began by examining my plugins, to see if any of them were slowing down the load time of the shell. Initially I tested this manually, by removing the plugins listed in my ~/.zshrc one at a time and then timing the updated config. Not the most efficient approach, though it certainly works.
How to Reload the Shell After Making Changes
A quick, but important note. If you're trying to speed up your shell, you're going to be making a number of changes to your configuration files, primarily ~/.zshrc. In order for these changes to be picked up, you'll need to restart your shell session. Here's the important part: Don't use source ~/.zshrc to reload your shell config. The docs make it clear that this is the wrong approach and can cause problems. Instead, you should run exec zsh. Boom, shell session restarted, changes picked up, and you're good to go.
Timing All Plugins Programmatically
A little more reading lead me to realize that I could programmatically profile the source/load time of all my plugins at once by making some temporary adjustments to ~/.oh-my-zsh/oh-my-zsh.sh. If you've installed Homebrew/coreutils, this can be done using gdate. In oh-my-zsh.sh, you'll want to update the portion of the script that loads the plugins (around line 101 at the time this was written), with the following, which wraps the process in a timer:
# Load all of the plugins that were defined in ~/.zshrc
for plugin ($plugins); do
  timer=$(($(gdate +%s%N)/1000000))
  if [ -f $ZSH_CUSTOM/plugins/$plugin/$plugin.plugin.zsh ]; then
    source $ZSH_CUSTOM/plugins/$plugin/$plugin.plugin.zsh
  elif [ -f $ZSH/plugins/$plugin/$plugin.plugin.zsh ]; then
    source $ZSH/plugins/$plugin/$plugin.plugin.zsh
  fi
  now=$(($(gdate +%s%N)/1000000))
  elapsed=$(($now-$timer))
  echo $elapsed":" $plugin
done
Now, I don't use Homebrew, so I had to adjust this a little - I managed to put together an approximation, using Python. In place of the gdate scripts, I used:
$(python -c 'from time import time; print int(round(time() * 1000))')And, the result was:
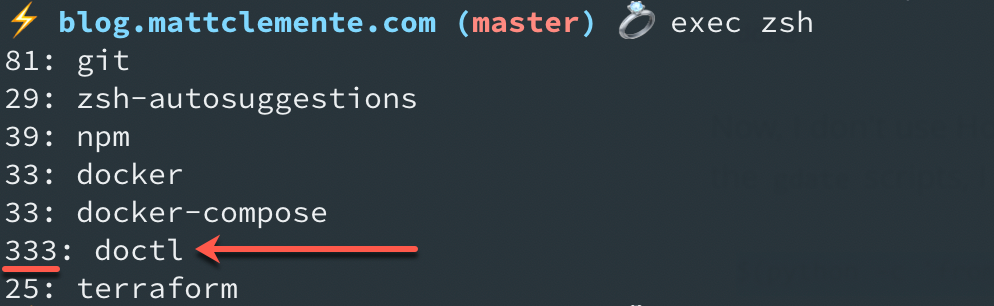
So, the doctl plugin was taking 10x longer than the others to load. I haven't been using doctl recently, so it was easy to remove the plugin. And, while it wasn't slow, I also dropped zsh-autosuggestions, which brought the shell load time down to about 1.10 seconds. Better, but still too slow.
Reminder: don't forget to remove those changes from oh-my-zsh.sh when you're done timing your plugins.
A Note on Profiling with zsh/zprof
So, at this point I probably could/should have used zsh/zprof, a profiling module that's built into Zsh.[3] But I didn't. Honestly, when I first explored it, I found the output a bit overwhelming and just moved on. A later, more thorough analysis lead me to realize its value.
Using zsh/zprof is straightforward: add the line zmodload zsh/zprof to the start of your ~/.zshrc; after saving/reloading your shell, you can run the command zprof to get profiling information. The results look something like this, though they'll be far longer:

Now, that's a lot of information; don't let your eyes glaze over.
Here's my opinion - for speeding up your shell, the information that matters the most is the self/percent column, right before the function names. This indicates the the percentage of time spent in the function, and it gives you a general idea of what's taking up most of the shell load time. You'll still need to do some digging to determine where the function is being called, and how to address it.
In my case, it's pretty clear from those results that something with nvm is taking up more than 50% of the shell load time - a conclusion I had reached independently, while searching for causes of slow-loading shells.
It's Probably nvm
If you start searching the web for reasons that your shell is slow, you're going to come across posts (like this one) pointing the finger at nvm. I'm not here to diagnose why; just to say that it was the single longest loading portion of my shell startup as well. Removing nvm shaved a half-second off the startup time, dropping it to .57 seconds.[4]
Obviously, I want to use nvm - it's a really helpful tool - getting rid of it entirely might speed up my shell, but it doesn't actually help me. Fortunately, there are a couple of more practical solutions that enable us to keep nvm and speed up the shell load time. Even better, these will work for other virtual environment tools as well.
Handling Virtual Environments
While nvm turned out to be the biggest culprit for my shell's slowdown, the other virtual environment tools I use, rbenv and jenv, were not without blame. Removing them resulted in a startup that was .35 seconds faster.
So, the question arises, how do we use these virtual environment tools while also keeping our shell startup snappy? It seems there are two primary answers: Lazy Loading and Caching Eval statements.
Lazy Loading
The issue with these virtual environment tools, as helpfully explained by @htr3n, is that they are eagerly loaded, even when they are not needed. There's no reason for nvm to be loaded if I'm not working on a node project. The only reason I have rbenv is for when I'm using Jekyll for this blog - it doesn't need to be loaded every time. Lazy loading refers to a variety of approaches for delaying the loading of these virtual environments until they are needed.
If you search the web, you'll find a number of approaches to lazy loading nvm, but the best and easier one I found is built into the plugin zsh-nvm.[5] Actual loading of nvm is not only triggered by running the nvm command, but also by node, npm, or any of your npm global binaries. I added it to my Oh My ZSH plugins and configured it like this:
export NVM_LAZY_LOAD=true
export NVM_COMPLETION=true
plugins=(zsh-nvm git npm docker docker-compose terraform)
The resulting shell startup time was .70 seconds. A little bit slower than removing nvm entirely, but totally worth the tradeoff, because I can still use nvm as needed.
Now, there are some scripts out there for lazy loading jenv and rbenv, but I couldn't find any that I was entirely comfortable with, so I took a different tack with them.
Caching Eval
The way rbenv and jenv work is by running an eval statement in your config file:
# ~/.zshrc
eval "$(rbenv init -)"
eval "$(jenv init -)"
The approach I settled on for these was to cache the result of that eval statement when it's first run, so that subsequent loads don't incur a startup penalty. This was not my idea. It came from the zsh evalcache plugin, which I stumbled across during my research. The docs outline how the plugin works to address slow startups, and it seemed a clever solution.
The resulting config looks something like this:
plugins=(evalcache zsh-nvm git npm docker docker-compose terraform)

export PATH="$HOME/.rbenv/bin:$PATH"
export PATH="$HOME/.jenv/bin:$PATH"

source $ZSH/oh-my-zsh.sh

_evalcache rbenv init -
_evalcache jenv init -
_evalcache direnv hook zsh
You'll notice that I also passed direnv to the evalcache plugin, since it's loaded the same way. With that adjustment, shell startup was down to .56 seconds
Summary
So, we started with a shell load time of 1.35 seconds, and ended at .56 seconds - reducing the startup time 0.79 seconds, all while keeping our essential tools and commands. We did it by:
- Finding and removing a slow/little used plugin
- Lazy loading
nvmusing the zsh-nvm plugin - Speeding up other virtual environments using the evalcache plugin
Now, I know that I could do more to shave off fractions of a second, but like I said at the top, I'm not interested in spending hours micro-optimizing. I'm happy with the result, and hope it helps you if you've experiencing any issues with a slow loading zsh shell.
Resources
The following are some of the posts and guides I used while working on this - many thanks to the authors for sharing them - and hopefully you find them helpful as well. In no particular order:
- https://blog.jonlu.ca/posts/speeding-up-zsh
- http://broken-by.me/lazy-load-nvm/
- https://www.growingwiththeweb.com/2018/01/slow-nvm-init.html
- https://bennycwong.github.io/post/speeding-up-oh-my-zsh/
- https://carlosbecker.com/posts/speeding-up-zsh
- https://htr3n.github.io/2018/07/faster-zsh/
- https://medium.com/tarkalabs/optimize-zsh-fce424fcfd5
Footnotes
For examples of elaborate dotfiles, see those by caarlos0 or holman ↩︎
For my own reference, the
zshdocs explain the-iand-carg ↩︎Here are the docs on the zsh/zprof module, for those interested. ↩︎
To be clear, by removing NVM, I mean removing it from my
~/.zshrc. That is, deleting the source lines you're instructed to add when installing it. ↩︎Not to be confused with the plugin named simply nvm, which is listed on the official Oh My Zsh plugins page, but which doesn't provide the functionality we're looking for. ↩︎
